
When it comes to weeknight meals that feel elegant yet take minimal effort, Honey Glazed Salmon is a top-tier choice. The natural richness of salmon pairs beautifully with the sweet, sticky glaze, creating a dish that is simultaneously indulgent and refreshingly light. It’s one of those recipes that strikes a perfect balance: the sweetness of honey, the saltiness of soy sauce, the brightness of fresh citrus, and the subtle heat from optional spices all come together in a harmonious bite.
In this comprehensive guide, I’ll take you through the steps to create flawless honey glazed salmon at home, with tips on selecting the best salmon, achieving that perfect caramelized crust, common pitfalls to avoid, preparation strategies, flavor variations, and guidance for customizing the dish to different dietary needs.
Why Honey Glazed Salmon Is Such a Crowd-Pleaser
Honey glazed salmon is a classic example of balanced flavor layering. It combines:
- Sweetness: From honey, which caramelizes beautifully during cooking.
- Savory Depth: Provided by soy sauce, garlic, or even Dijon mustard.
- Brightness: From fresh lemon or lime juice that cuts through the richness.
- Optional Heat: Through red pepper flakes, cayenne, or chili paste.
It’s a dish that feels fancy enough for a dinner party but is simple enough for a Tuesday evening. It also pairs well with a variety of sides like steamed rice, roasted vegetables, or crisp salads, making it endlessly versatile.
Choosing the Right Salmon: Fresh, Frozen, and Cuts
The quality of salmon plays a pivotal role in this dish’s success. Here’s how to choose wisely.
Fresh vs. Frozen
- Fresh Salmon: Always ideal, especially if wild-caught. Look for salmon with moist, vibrant flesh and no strong fishy smell.
- Frozen Salmon: Works well if high quality and properly thawed. Wild Alaskan salmon or sustainably farmed varieties are excellent choices.
Salmon Cuts
- Fillets: Best for this dish, offering even cooking and beautiful caramelization.
- Skin-On vs. Skinless: Both work. Skin-on helps protect the salmon from overcooking and adds texture if crisped properly.
Key Ingredients: Building Sweet and Savory Layers
The magic of honey glazed salmon comes from its simple, well-balanced glaze.
Salmon
- Fresh, center-cut fillets with consistent thickness ensure even cooking.
Honey
- Acts as both a sweetener and a caramelizing agent.
Soy Sauce
- Provides umami depth and balances the honey’s sweetness.
Garlic
- Adds aromatic punch and warmth.
Citrus
- Lemon or lime juice brightens the glaze and enhances the salmon’s natural flavors.
Optional Heat
- Red pepper flakes, sriracha, or cayenne pepper can add a pleasant kick.
Equipment Recommendations
You don’t need specialized tools, but a few basics will ensure great results:
- Non-stick skillet or cast iron pan: For achieving the perfect sear.
- Spatula: For flipping the salmon gently without breaking it.
- Basting brush or spoon: To coat the salmon with glaze during cooking.
- Zester: For optional citrus zest garnish.
Optional: A kitchen thermometer to ensure precise doneness (salmon is perfectly cooked at 125°F / 52°C for medium).
Common Mistakes and How to Avoid Them
1. Overcooked Salmon
- Salmon dries out quickly if overcooked.
- Solution: Cook just until the internal temperature reaches 125–130°F (52–54°C) for moist, flaky fish.
2. Burnt Glaze
- Honey burns easily due to its sugar content.
- Solution: Start with medium heat and monitor carefully; flip only when the first side is well caramelized but not burnt.
3. Salmon Sticking to the Pan
- Typically occurs if the pan isn’t hot enough or if you try to flip too early.
- Solution: Heat pan properly and wait until the salmon releases easily before flipping.
4. Unbalanced Glaze
- Glaze that’s too sweet or too salty can overwhelm the salmon.
- Solution: Taste the glaze before applying to adjust the honey-soy ratio.
Preparation Strategies and Time-Saving Tips
Make-Ahead Options:
- You can mix the glaze up to 3 days in advance and refrigerate.
- Salmon can be seasoned and portioned the night before cooking.
Cooking Time:
- Honey glazed salmon cooks quickly—usually within 8–10 minutes total.
Serving Temperature:
- Best served hot or warm. The glaze thickens as it cools, but reheating is easy if needed.
Flavor Variations and Creative Twists
Spicy Honey Glazed Salmon:
- Add sriracha, chili paste, or crushed red pepper to the glaze for a subtle or bold kick.
Asian-Inspired:
- Add grated ginger, a splash of rice vinegar, and sesame oil for extra depth.
Herbaceous Version:
- Finish with fresh thyme, parsley, or cilantro for a burst of herbal freshness.
Citrus Variations:
- Use orange juice or zest for a sweeter, rounder citrus profile.
- Lime juice adds a sharp, tropical twist.
Ingredient List
For the Salmon:
- 4 salmon fillets (about 6 ounces / 170 g each), skin-on or skinless
- Salt and pepper to taste
- 1 tablespoon olive oil
For the Honey Glaze:
- ⅓ cup (80 ml) honey
- 3 tablespoons soy sauce (low sodium recommended)
- 2 tablespoons fresh lemon juice (plus extra lemon wedges for serving)
- 3 cloves garlic, minced
- ½ teaspoon red pepper flakes (optional for heat)
For Garnish (Optional):
- Lemon zest
- Chopped fresh parsley or cilantro
- Sesame seeds
Step-By-Step Instructions
1. Prepare the Salmon
Pat salmon fillets dry with paper towels and season both sides lightly with salt and pepper.
2. Make the Glaze
In a small bowl, whisk together honey, soy sauce, lemon juice, minced garlic, and red pepper flakes (if using). Taste and adjust balance as needed.
3. Sear the Salmon
Heat olive oil in a non-stick or cast iron skillet over medium heat.
Place salmon fillets skin-side down (if using skin) and cook undisturbed for 4–5 minutes until the bottom is golden brown and the fish releases easily.
Flip the fillets carefully and cook for another 2–3 minutes.
4. Add the Glaze
Pour the honey glaze into the pan around the salmon (not directly over it initially to prevent burning).
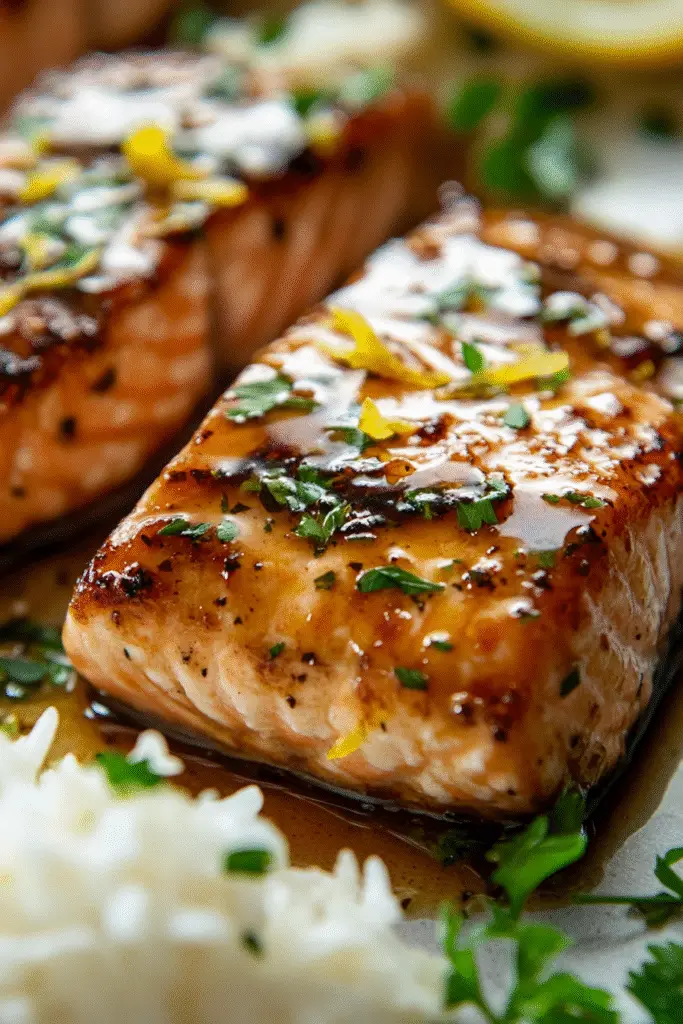
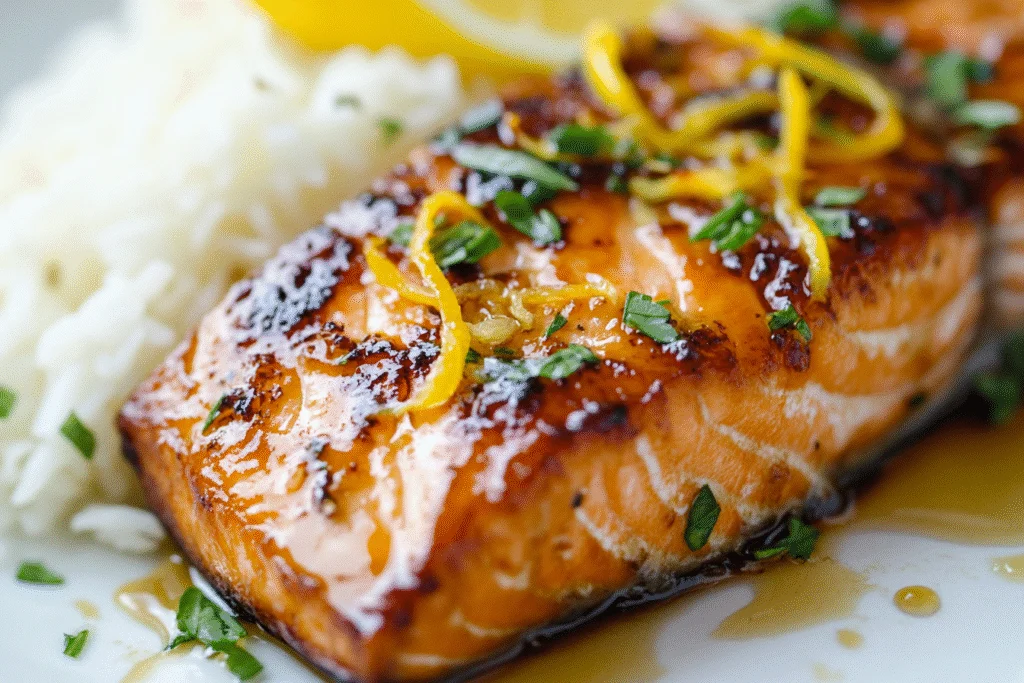
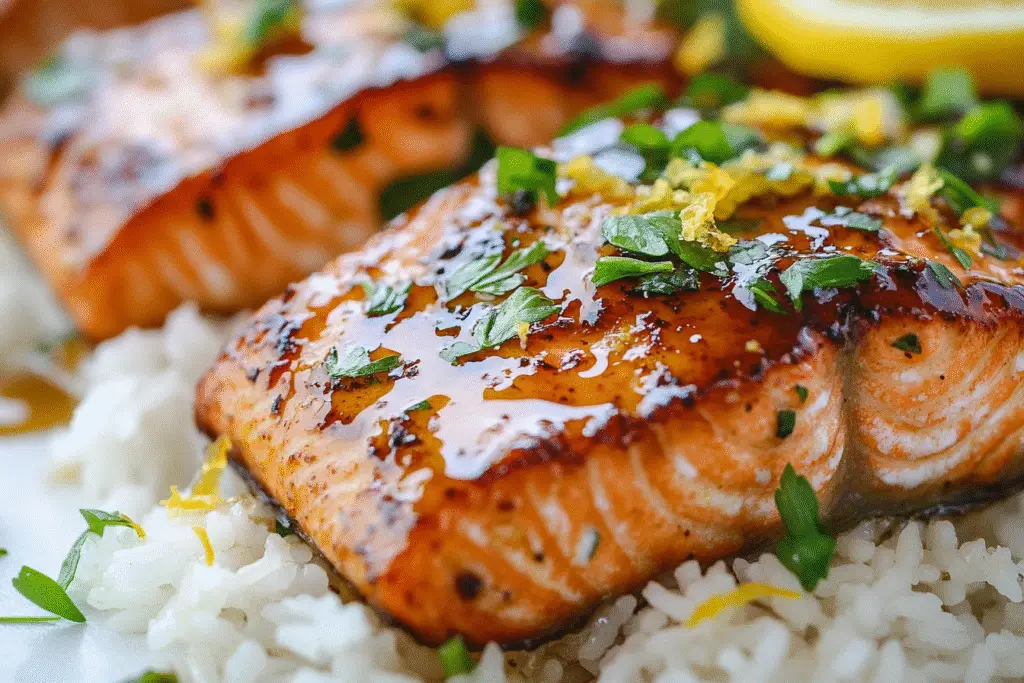
Spoon the glaze over the fillets as it thickens, basting the salmon continuously for 1–2 minutes until the glaze becomes sticky and glossy.
Remove the pan from heat once the salmon is cooked through and well coated.
5. Serve
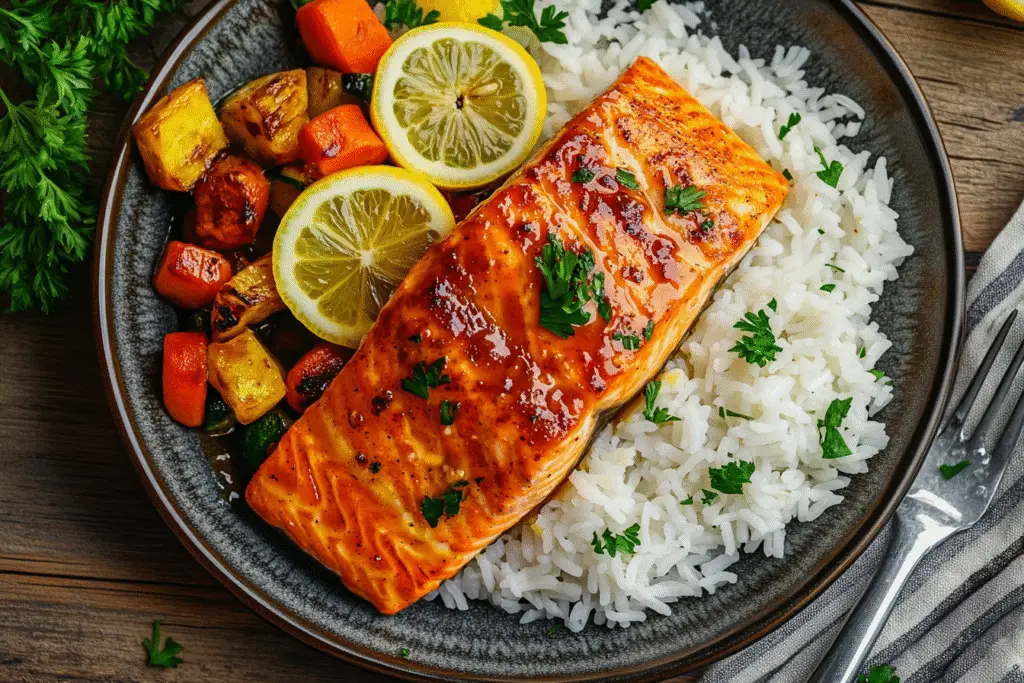
Transfer salmon to plates, spoon extra glaze over each fillet, and garnish with lemon zest, fresh herbs, or sesame seeds.
Serve immediately with your choice of side dishes such as steamed rice, roasted vegetables, or a crisp green salad.
Troubleshooting and FAQs
Can I bake the salmon instead?
Yes. Place seasoned salmon in a baking dish, pour glaze over the top, and bake at 400°F (200°C) for 12–15 minutes. Broil briefly to caramelize the glaze if desired.
What if the glaze thickens too much?
If it reduces too quickly or becomes too sticky, add a splash of water or lemon juice to loosen it.
Can I use other fish?
Yes. This glaze also works beautifully with cod, trout, or halibut.
How do I store leftovers?
Store in an airtight container in the fridge for up to 3 days. Reheat gently on the stovetop or in the microwave to prevent the glaze from burning.
Variations: Classic, Spicy, and Baked Options
| Version | Cooking Method | Flavor Profile | Add-Ins |
|---|---|---|---|
| Classic | Pan-seared | Sweet, savory, citrus | Garlic, lemon |
| Spicy | Pan-seared or baked | Sweet, savory, spicy | Sriracha, chili flakes |
| Baked | Oven-baked | Mildly caramelized, lighter | Optional broiling for crust |
Each version offers a slight twist on this easy, delicious preparation while keeping the signature balance of flavors.
Storage and Reheating Tips
- Storage: Refrigerate leftovers in an airtight container for up to 3 days.
- Reheating: Warm gently on the stovetop over low heat, adding a splash of water or fresh lemon juice to refresh the glaze. Microwaving is also acceptable but can slightly toughen the fish.
- Freezing: Not recommended, as the glaze may separate upon thawing and reheating.
Final Thoughts
Honey Glazed Salmon is one of those beautifully balanced dishes that feels sophisticated yet is incredibly simple to prepare. The glaze caramelizes to perfection, the salmon stays moist and flavorful, and the overall dish is endlessly adaptable to your taste preferences.
Whether you’re cooking for yourself, your family, or guests, this recipe is a guaranteed crowd-pleaser that’s ready in under 30 minutes. Try it with different citrus twists, spice levels, or proteins to make it your own—I’d love to hear how you customize this sweet and savory classic!